It’s almost that time of the year to break out all your greenery, tinsel, and trees. Well, honestly after how 2020 is going you may have it all out already, I know I do! A great way to add a little flair without breaking the bank is making your own DIY Christmas Scroll.
For the last couple of years I had been coveting a few online, but this year my husband cut me off on my Christmas expenditures. I took a closer look at the scrolls, and thought that it could be made!
Paper Scroll Materials
- A roll of twine
- Roll of brown craft paper (I got mine here at Hobby Lobby, I bought a huge roll because I plan on using it for Christmas wrapping too!)
- Paint marker, or sharpie (I recommend a paint marker)
- Paper clips or clothespins (I recommend a paper clip, but we didn’t have any)
- Command hook or nail (for hanging)
Step 1: Measuring for your scroll
Measure the Space
The first thing you want to do is measure out how big you want the scroll to be in your space. You don’t want to make a disproportionate piece, or it might look awkward.
I knew that I was going to place mine where we had a painting, so I wanted it about the same size. I did break out the measuring tape and double-check before cutting!
Measure the paper
Before you go snipping away at your paper, remember that you want to make your scroll a few inches longer than the actual size! You need to have enough extra paper to roll it.
I used about 10 extra inches on each side. You can definitely get away with less. Mine was personal preference. I rolled it up and liked the size better. I also rolled it over on itself a few times to strengthen the paper.
Step 2: Cut and Clip

After you measure the paper for your scroll, you are ready to clip and cut.
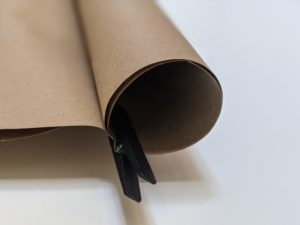
I would roll the loose (not connected to the roll) end first. Make sure that it looks the way you like, then place a paper clip over the roll on each side. This will hold the roll together. You can also use hot glue if you are worried about it not being secure. We used clothespins (as seen below) because that’s all I had on hand. I actually kind of like the look of the clothespins.
Repeat the process on the other side after cutting the paper!
Step 3: Get artsy and write out your phrase, or vinyl it!
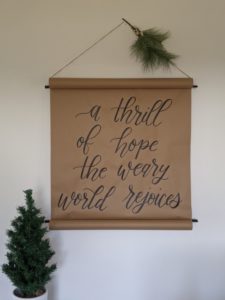
This is the fun part! You get to write your phrase. Pinterest has a plethora of ideas you can use to figure out a good quote. I used a phrase from the song O Holy Night. Before putting the permanent pen to paper, make sure you use a pencil to sketch it on first! Once you are happy with your design, give your paint pen a few shakes and trace over your pencil!
Alternative Idea- if you are someone who has access to a Cricut or silhouette, you can always design something on the computer and have the machine cut out some black vinyl for you. Then you can just transfer it on to your paper scroll. Easy!
Step 4: String and Hang Your Paper Scroll

There are a few ways you can attach twine to your scroll. Because I made my top part of the scroll a bit sturdier by looping the paper a few times, I decided to run a line of twine through my scroll.
I pulled the twine through and held up a scroll to get a length that I liked and tied a double knot. I cut off the excess and it was ready to be hung!
If you want a sturdier scroll, you can always find a dowel rod and run it through, then tie the twine to the ends of the rod!
If you have any questions, feel free to leave a comment or send us a message on our contact page!

